Rear Suspension Ball Joint Seal Replacement
Greg Ford - 10/25/2014
I have procrastinated on replacing my rear suspension ball joint seals for a while because
I did not have a good way to pop the ball joint out of the suspension’s tapered hole. But the seals were completely
cracked and dropping off. So the joint was exposed to the elements. Not good.
The tapered fork tool was not an option because I do not like hammering on anything to break it loose.
Then on the internet, I saw a tool sold by Harbor Freight, which uses leverage on the end of the ball joint to pop it out.
Note: This tool could also be used on the ball joints of the front suspension.
This is the procedure I used:
I purchased the boots from Summit Racing for $5.00 a pair. They are made by Energy Suspension, right in San Clemente, California.
The four front ball joint seals and two upper rear ball joint seals all use Energy part number 9.13119R (the 'R' stands for red. If you want black, substitute 'G' for the 'R')
It is recommended to trim 1/8" around the base of them to get the best fit.
Note: The two tie rod seals are the smaller Energy part number 9.13101R (or 'G')

The tool to pop the joints out is from Harbor Freight for $25.00

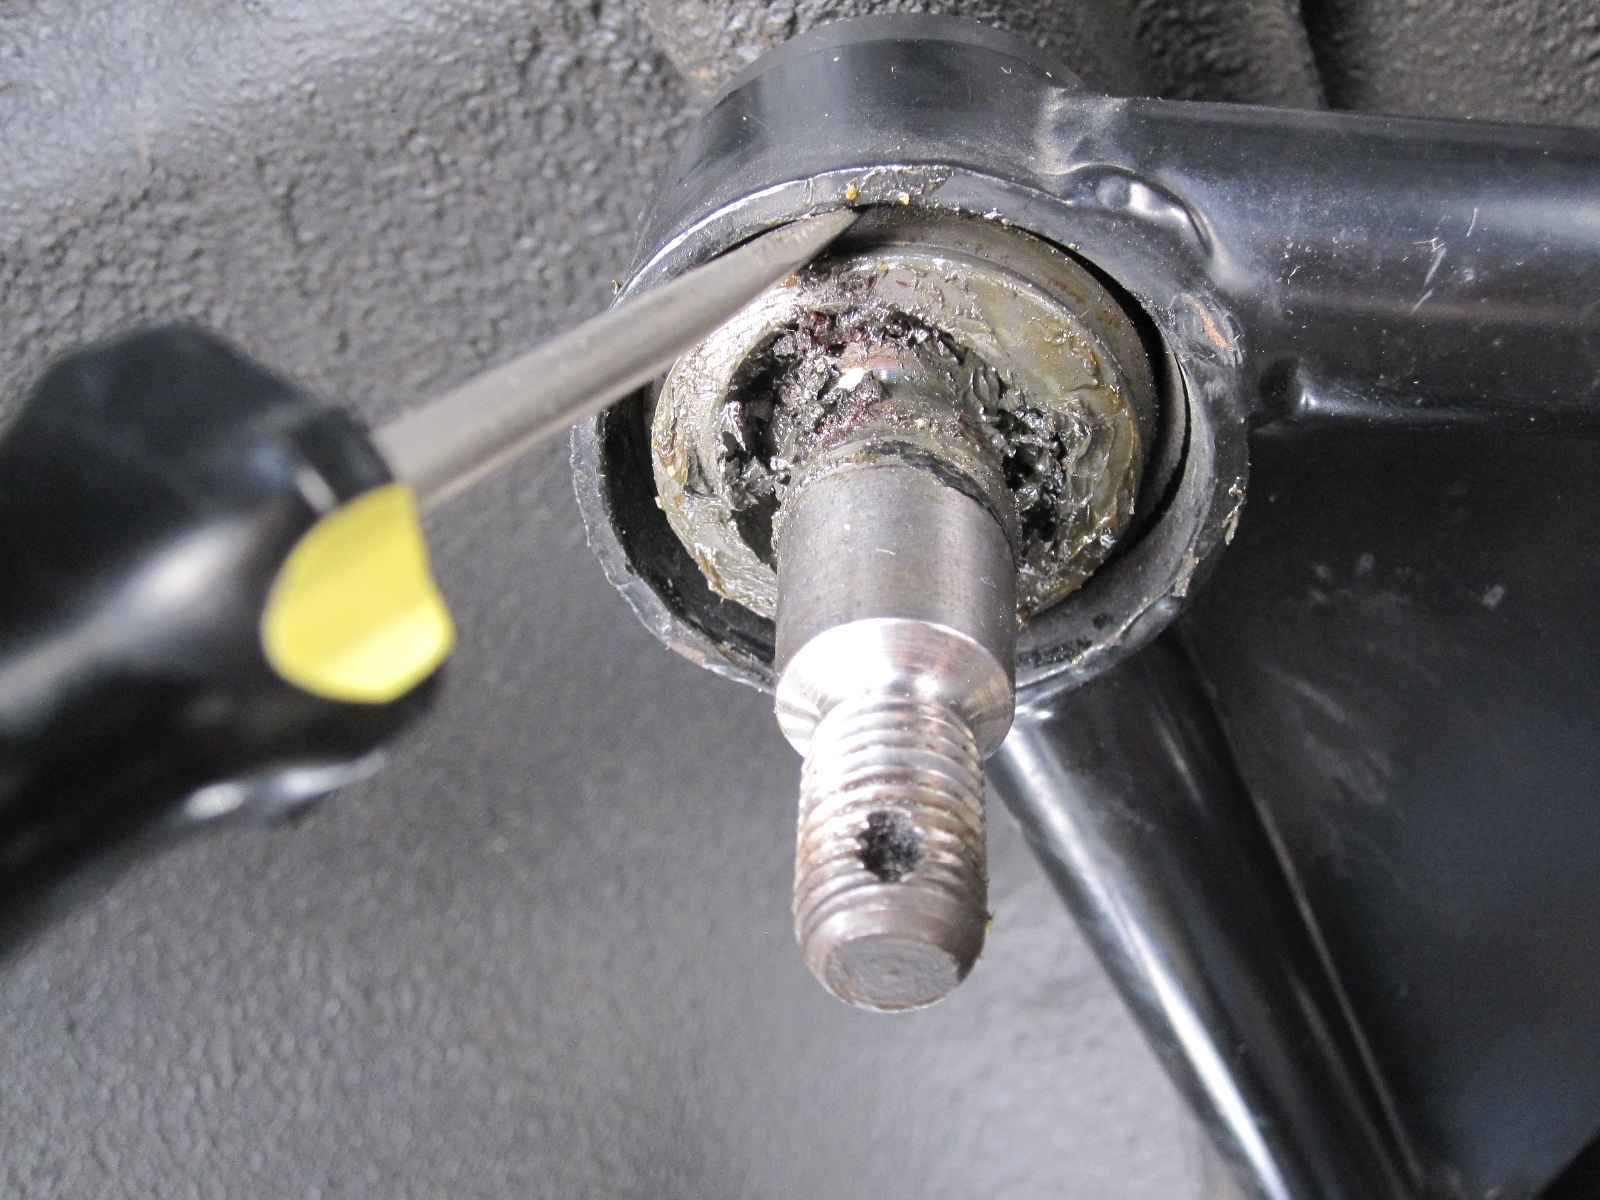
This picture shows the tool mounted and ready to start tightening the screw on the end of the arm. It did not take much pressure when the screw of the tool was turned before the joint popped loose. I left the nut loose on the end of the ball joint so when it popped loose it did not go flying up from the potential energy stored in the tool as it was tightened.

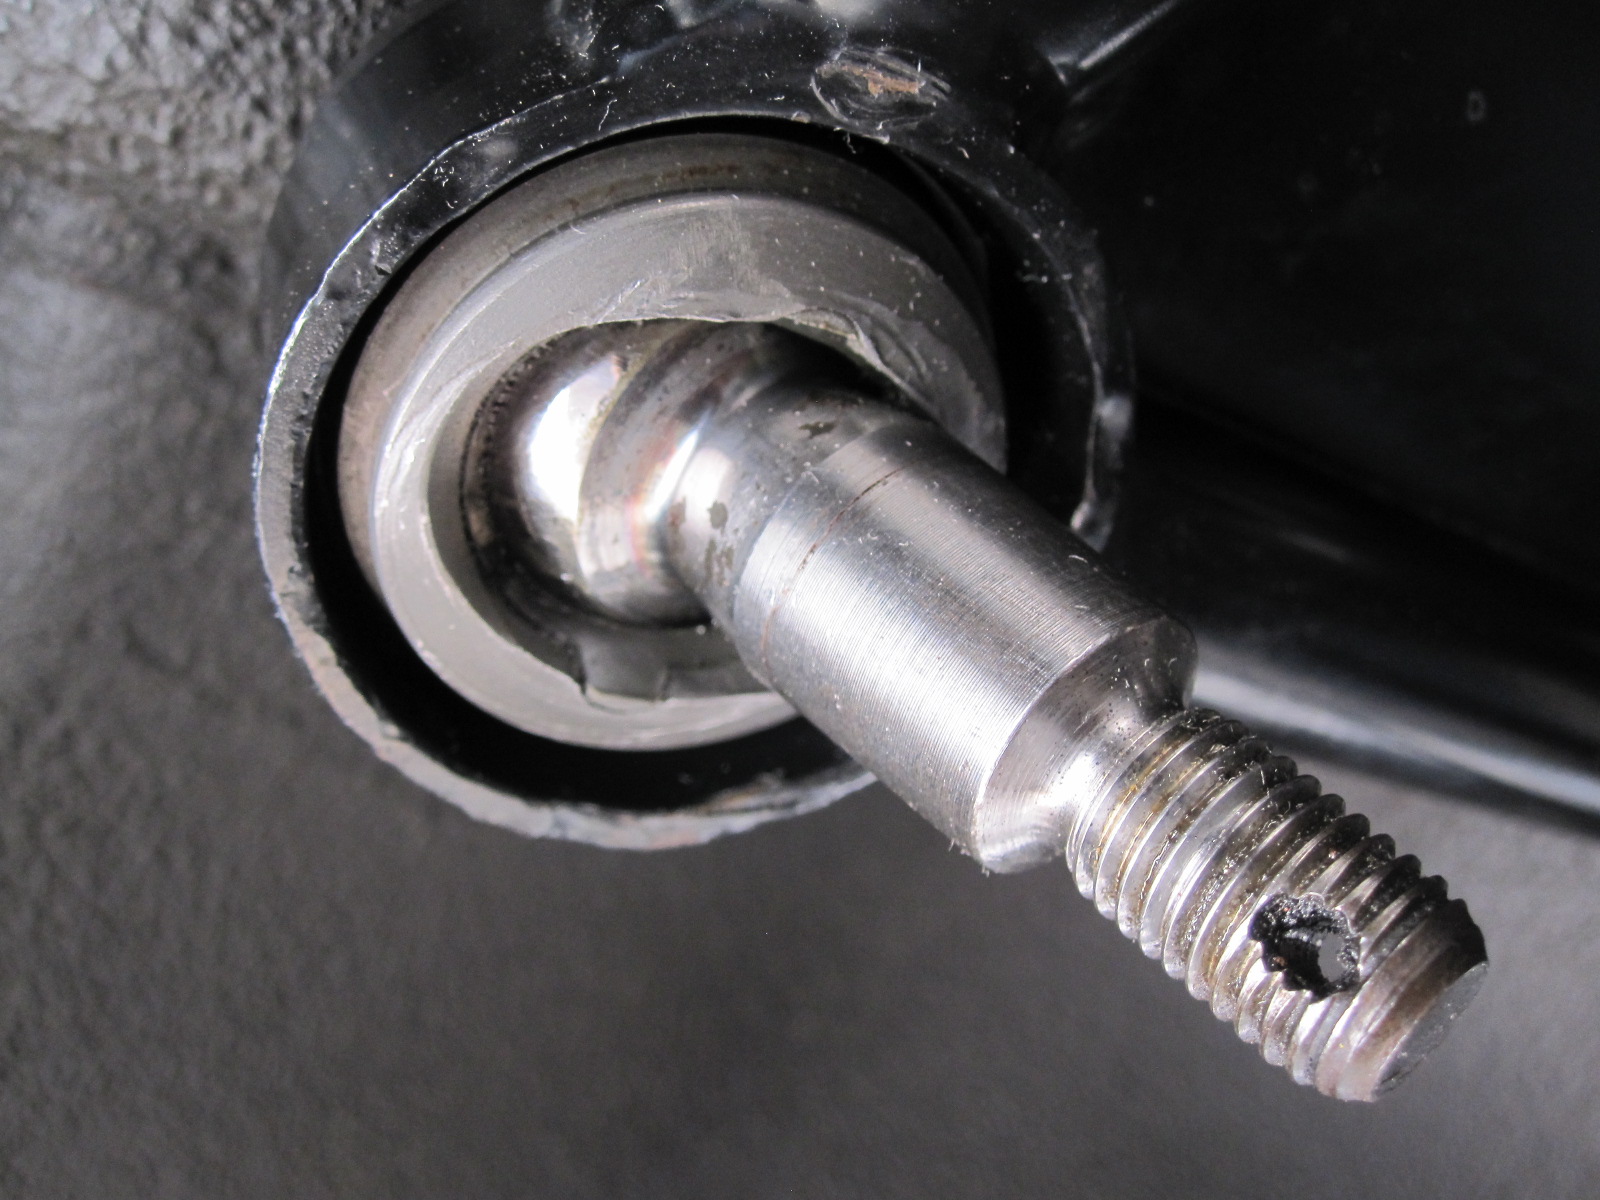
This picture shows the ball joint after it popped loose, the nut taken off, and pulled up out of the suspension up-right. Notice now the old boot had disintegrated.

My suspension still had the old white retaining clip in place. Use a small screw driver to pull it down and out. It will not be used with the installation of the new seal.

With the white retaining clip removed, I used a screwdriver to clean out the slot around the outside of the ball joint.
All clean and ready for reassembly. This ball joint is still very tight in its socket and did not require replacement. Upper ball joints usually last a very long time because they carry no load but just guide the upper end of the axle bearing housing.
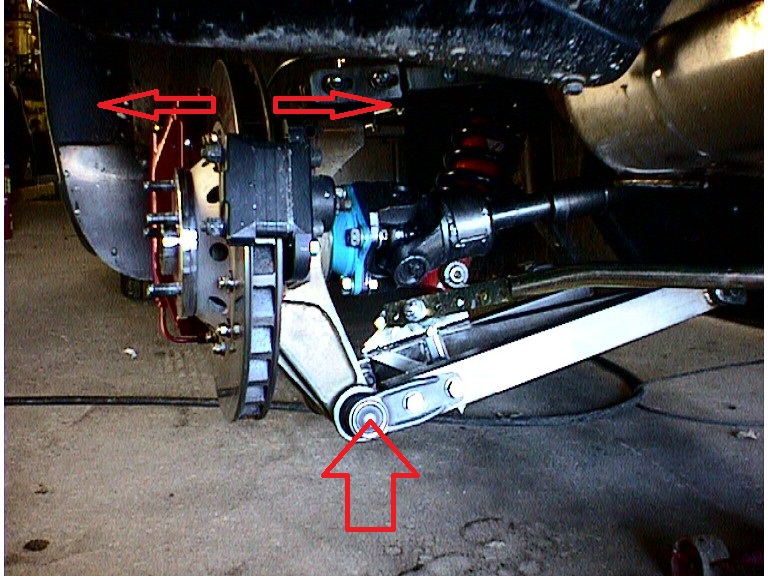
Note: While the upper ball joint was out, I grabbed the rear upright bearing housing at the top and moved it in and out (away from the car body, see upper arrows) to check for any binding or play in the lower shaft which attaches the lower end of the rear upright bearing housing to the lower control arm. (see lower arrow which shows the pivot point) It moved very freely and I heard no noises coming from it. Also, there was no sloppiness which would mean the bronze bushings inside, are worn.
I greased the surfaces of the ball and moved it around to get grease back up inside as much as possible.
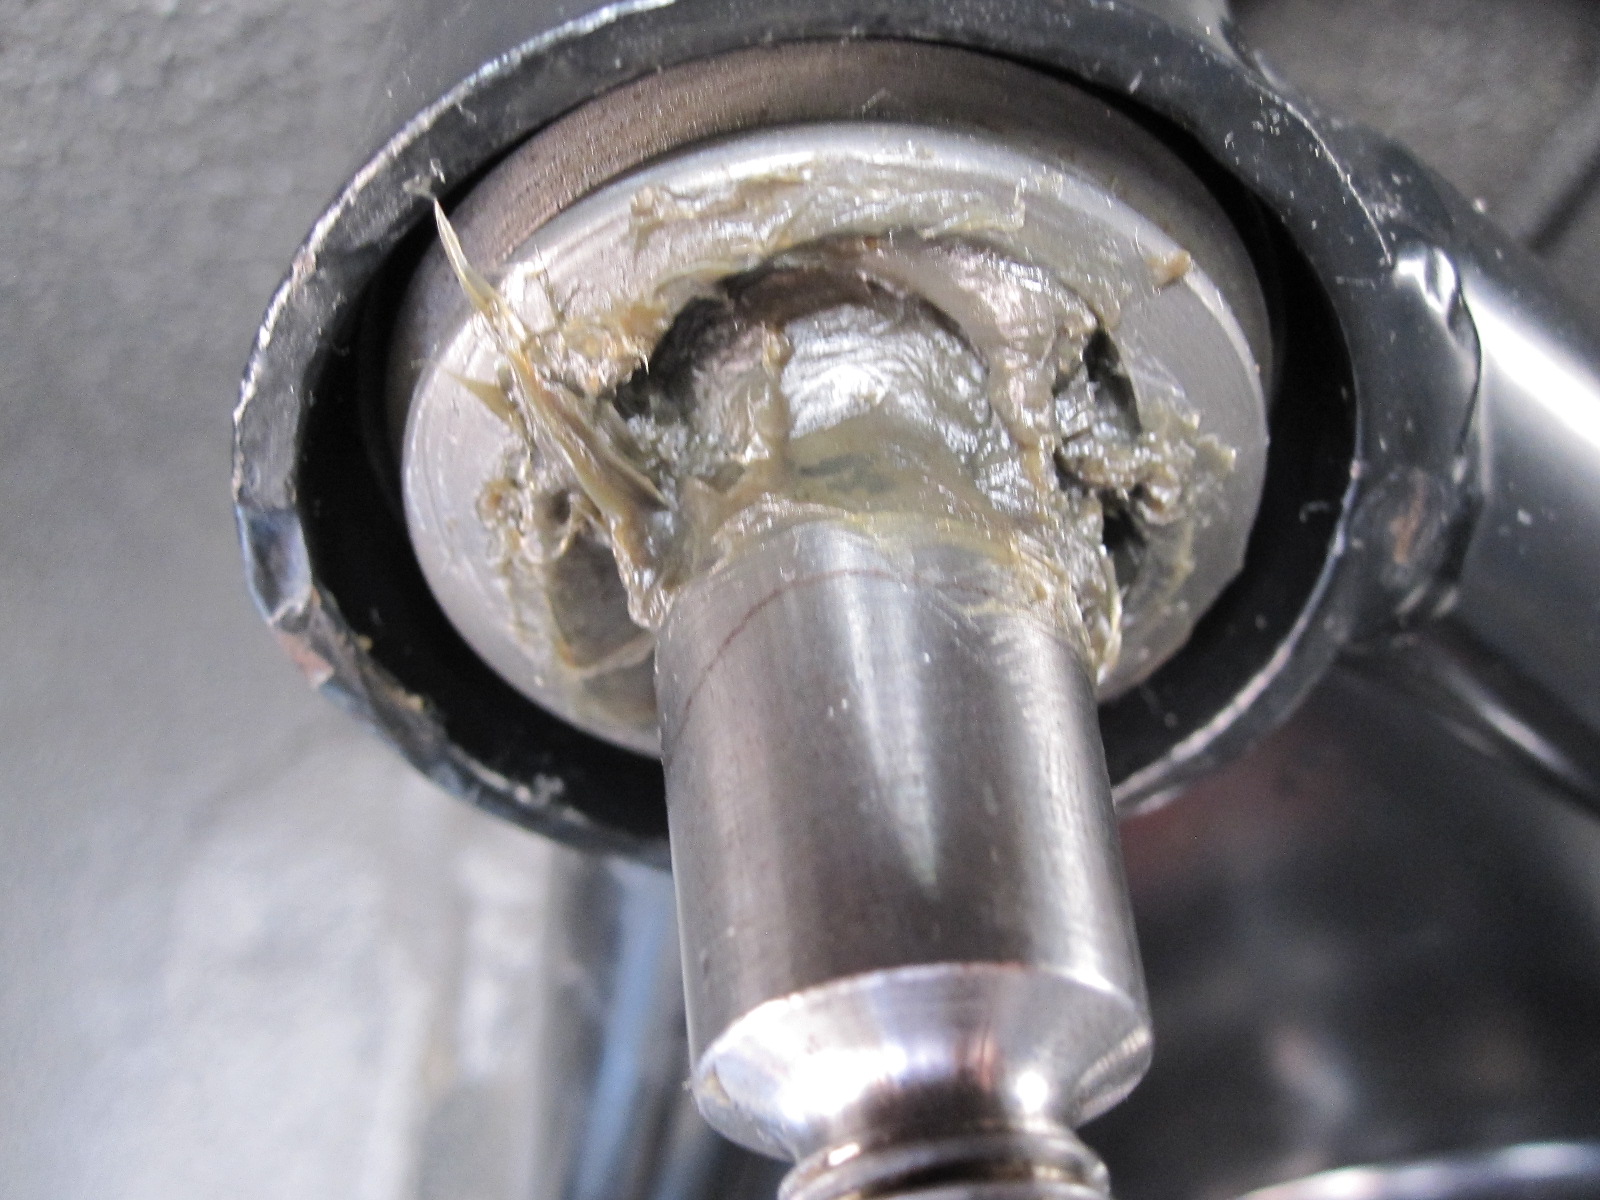
I filled the seal with grease. The idea is to have the seal balloon up a little and apply pressure to force more grease back up into the ball as it is being used. I know everybody says to drill in a zerk fitting from above, but I elected not to do that until the ball joint needs to be completely replaced, which is probably never.

Ready to be placed back down into the tapered hole of the suspension up-right.

Done. The nut is tightened to around 25 foot pounds and a new cotter pin holds it in place. You can see excess grease ooze out the right side of the seal in this picture. So I know I have the right amount of grease in there and some is being pressed out the top to equalize the pressure.
